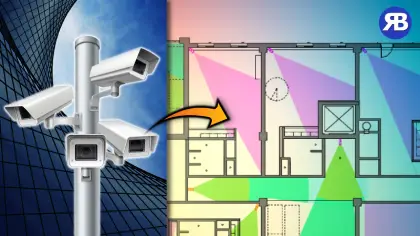
Generate CCTV Camera Coverage in Revit as Filled Regions
Designing CCTV systems in Revit often involves one repetitive and time consuming task. Drawing camera coverage areas for every security camera in your project. If your building contains dozens or even hundreds of CCTV cameras, manually creating Filled Regions to represent each camera’s field of view can quickly become one of the most tedious parts of the design process.
Fortunately, there is a much better way. In this tutorial, I will show you how to use Dynamo and a free Python script to automatically generate CCTV camera coverage in Revit. Best of all, you do not need any paid Revit plugins to follow along.
Resources
✅ The free Dynamo script from this tutorial
What You Will Learn
In this tutorial you will learn how to:
- Select a CCTV camera family in Revit
- Detect the room containing the camera
- Generate an isovist based on the camera location
- Account for walls and columns that block visibility
- Convert the isovist into a fully editable Revit Filled Region
- Prepare your workflow for automatic camera vision angles
By the end of the tutorial, you will have a reusable Dynamo workflow that can save hours of manual drafting on every project.
Why Generate CCTV Coverage Automatically?
Creating camera coverage drawings manually has several disadvantages.
❌ It takes a long time.
❌ It is difficult to keep drawings up to date.
❌ Every design change requires more manual editing.
❌ Large projects can contain hundreds of cameras.
Automation solves these problems by generating coverage regions directly from the model geometry. Instead of drawing each Filled Region yourself, Dynamo calculates the visible area inside each room and creates the region automatically. The result is a much faster and more reliable workflow.
How the Workflow Works
The automation process is surprisingly straightforward. First, you select:
- The CCTV camera family instance
- The room containing the camera
- The Revit view where the Filled Region should be created
- The Filled Region type to use
The Python script then extracts the room geometry and camera location before generating an isovist. An isovist represents everything visible from a particular point inside a space while taking surrounding obstructions into account.
Finally, Dynamo converts the resulting geometry into a standard Revit Filled Region that remains fully editable inside your project. This means you can continue modifying the region using normal Revit tools whenever required.
Why the Coverage Area Is Initially 360 Degrees
One thing you may notice is that the generated coverage region represents a full 360 degree isovist. This happens because the standard Dynamo isovist calculation assumes visibility in every direction from the camera location.
Fortunately, this is easy to improve. You can trim the Filled Region to match the actual viewing angle of your CCTV camera. Even better, the next tutorial will automate this process completely.
Coming Next
Most CCTV families already contain a parameter that stores the camera viewing angle. In the next tutorial, you will learn how to:
✨ Read the viewing angle directly from each camera family.
✨ Generate accurate camera coverage automatically.
✨ Process multiple CCTV cameras in one operation.
✨ Eliminate manual editing almost entirely.
This creates a workflow that is much closer to what professional security consultants use on real projects.
Looking for an Even Faster Solution?
The free Dynamo workflow is an excellent starting point and demonstrates the underlying concepts. If you regularly design CCTV systems, you may also be interested in RV Camera Planner. RV Camera Planner expands this workflow with additional automation features including:
- Automatic vision angle detection
- Multiple surveillance distance zones
- Identification zones
- Recognition zones
- Observation zones
- Detection zones
- Camera coverage generation for multiple cameras
- Instant 3D camera visibility views
It is designed specifically to help security consultants produce professional CCTV documentation much more efficiently. You can try RV Camera Planner completely free using the link below.
Final Thoughts
Automating CCTV coverage drawings is one of the easiest ways to save significant time during Revit based security design. Rather than manually sketching every Filled Region, Dynamo can calculate visible areas from your model and create editable Revit geometry in just a few seconds. Whether you are learning Dynamo, working as a BIM specialist or producing professional CCTV documentation, this workflow can become a valuable addition to your toolkit.
If you found this tutorial helpful, consider subscribing to my YouTube channel for more advanced tutorials covering Revit, Dynamo, Python, BIM automation and professional workflows for security design. Happy automating!