RV ClashBox: Generate section boxes for all Navisworks clashes
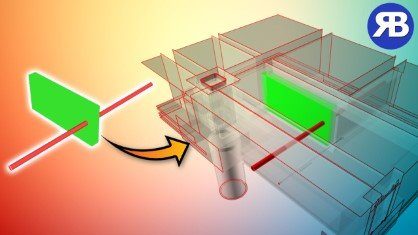
Do you need an easier way to see and understand Navisworks clashes in context? Creating a section box around each clash and making its surrounding elements transparent is the answer. Even better, this is a one-click job with RV ClashBox!
WHY CLASH REVIEW TAKES SO LONG
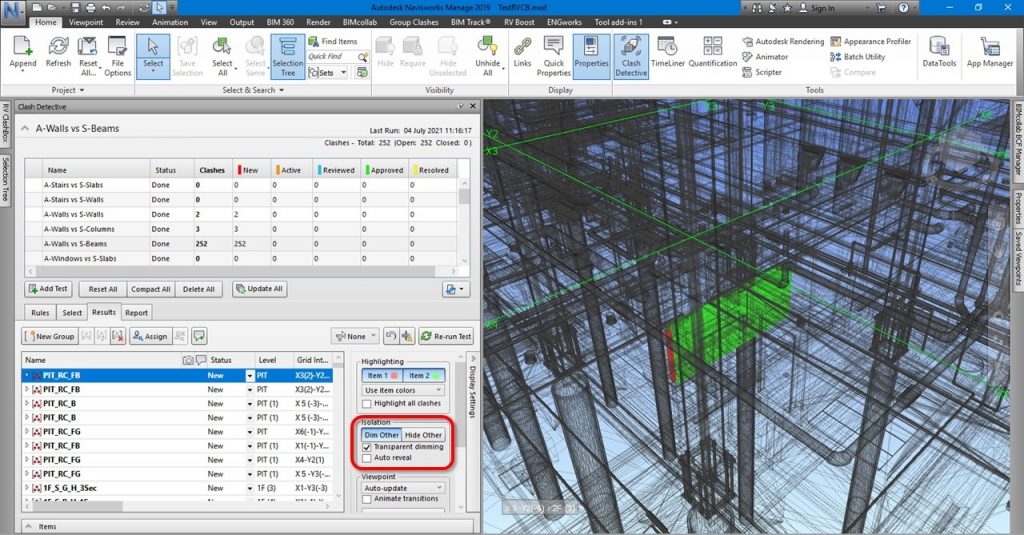
Navisworks is brilliant at quickly finding clashes between BIM models of all disciplines. However, the default clash viewing mode makes it quite hard to clearly see your clash results in context, especially on big projects. Out of the box, Navisworks only allows you to hide or dim surrounding elements, which effectively just shows them in wireframe mode. Once you have a large number of objects in the combined BIM model, it will start to look like this massive, confusing spider web:
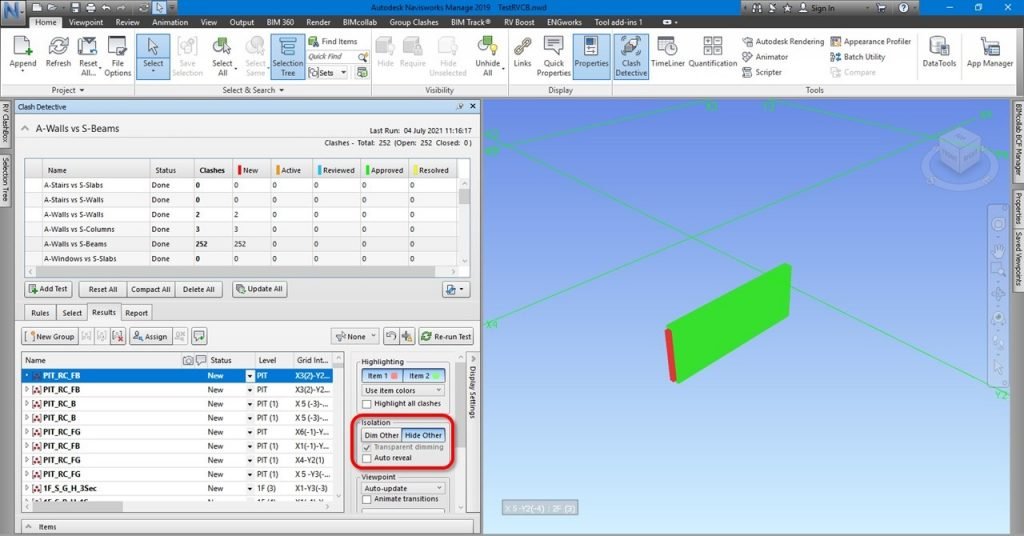
If you choose to hide the context instead of dimming it, clashing elements will clearly show. However, we now have no clue where in the building this clash occurs. Without this knowledge, it can be difficult to resolve this clash without affecting other aspects of the design.
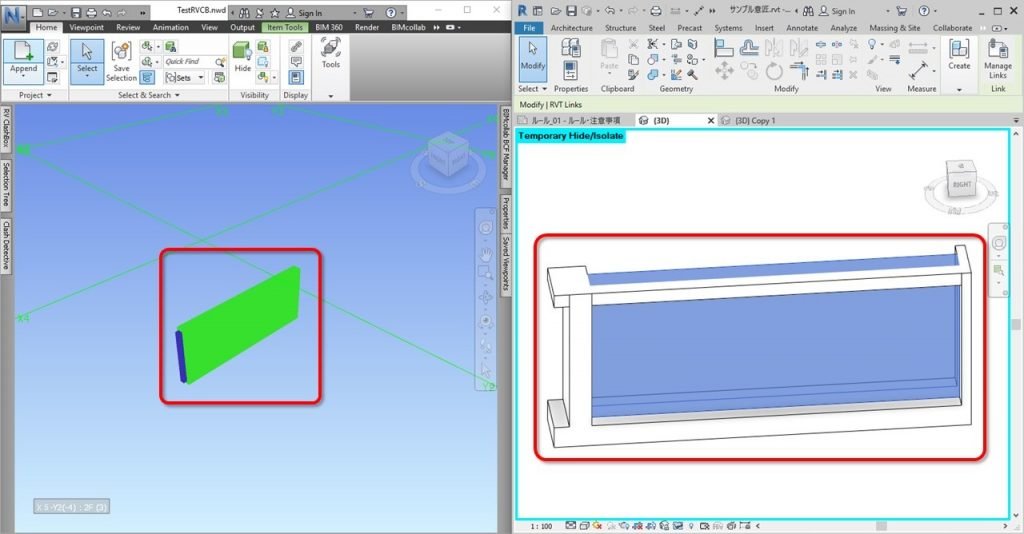
Of course, you can try to locate the clash in the original modelling program such as Revit or Archicad. Whether you do this manually or by automated means, this extra step will consume more of your valuable time. Additionally, clashing elements are shown differently in Navisworks and the original modelling application. This means you’ll spend extra time making sure you’re looking at the same thing in both windows. Even worse, the original 3D model may have been further developed by the design team, making the clash no longer visible there.
We used to struggle with this exact problem, for years. Back then, we spent many hours manually making these views presentable in upcoming design review meetings. We had to:
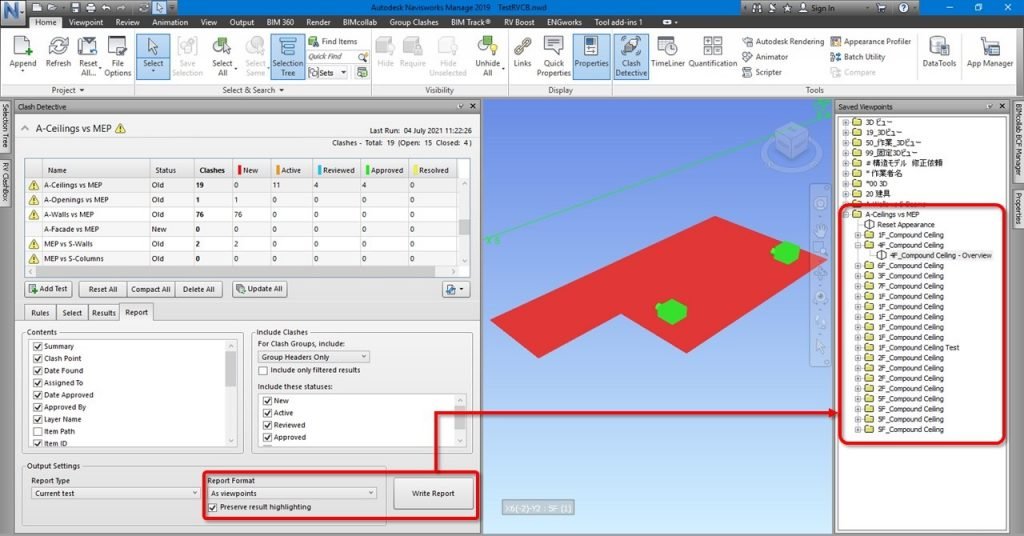
- Export clashes to viewpoints, with result highlighting preserved
- Select clashing elements in each view
- Enable sectioning in view
- Set the sectioning type to Box
- Set this box to fit the current selection
- Enlarge the section box on one or multiple sides to see more of the context
- Unhide all other elements in the model
- Select all these other elements
- Make them transparent, for example by 75%
- Update the saved viewpoint
- Repeat all these steps for the other hundreds of clashes!
On top of that, we needed to do all this before each meeting. Let’s face it, design review meetings are long, but there won’t be enough time to adjust each view while everyone else is watching your every click. Fancy firing up Revit as well to show the same clash? You’ll quickly put them to sleep! In reality, some laptops we take to meetings aren’t even strong enough to open our Revit models. It’s clear that we need to do all this preparation in Navisworks only, and quickly.

OUR 1-CLICK SOLUTION
Well, after so much overtime, we created RV ClashBox to automate all that. It’s a nice little Navisworks plugin that generates sectioned views from your clash tests, and optimizes all these views to instantly make them presentation-ready!
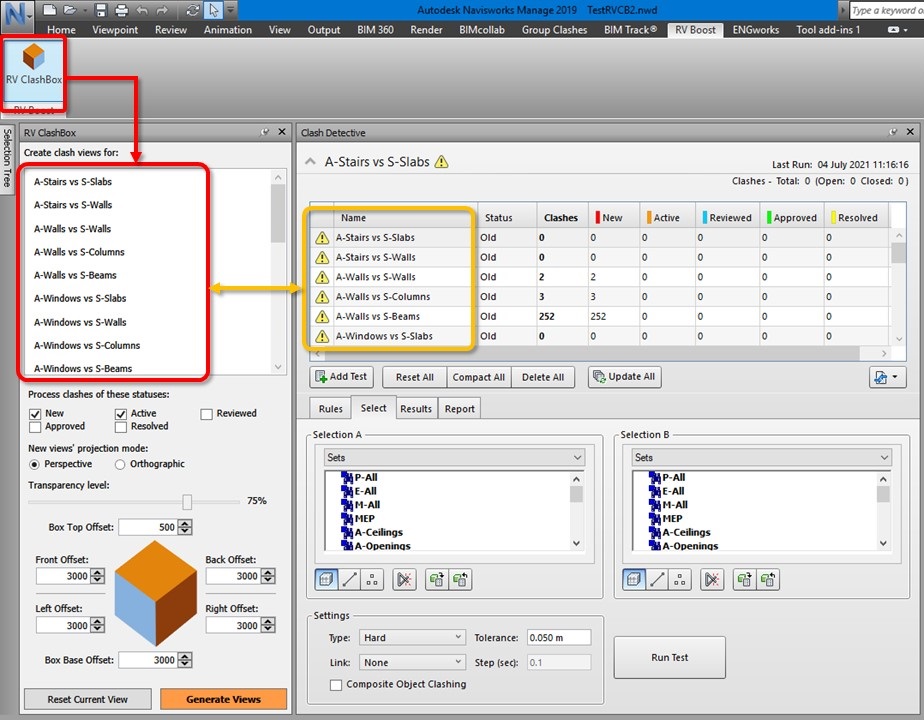
On launch, RV ClashBox will list all clash tests you have in the Navisworks file. You can then select one or several tests. As you add, update or remove tests in Clash Detective, RV ClashBox will update this list in real time.
Next, select how you want clash views to look like:
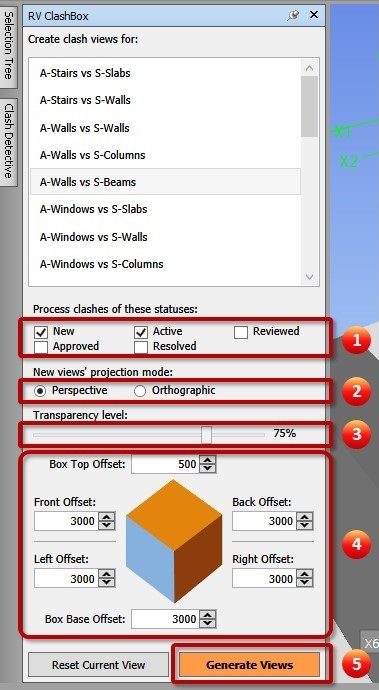
- Set whether only clashes of certain statuses should be processed, for example only New and Active ones.
- Set whether new viewpoints should be in perspective or orthographic mode.
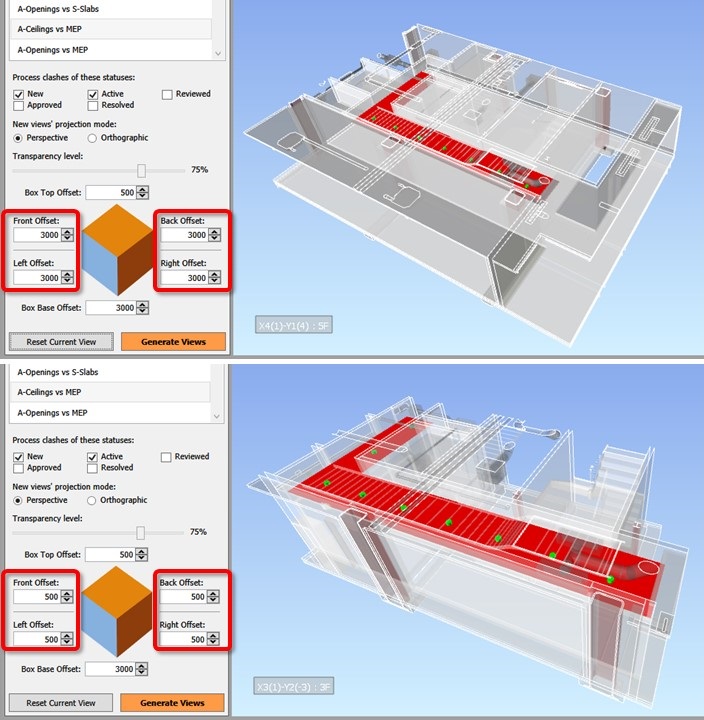
- Set the transparency ratio for context elements, i.e. all elements visible in the view other than clashing objects identified in each clash.
- Set the section box’s offset around clashing objects. You can control this offset separately for each direction: Front/Back, Left/Right, and Up/Down. For example, if you’re looking at clashes between MEP items above the ceiling and want to also see the room below each clash, simply increase the Bottom offset value.
Next, click Generate Views and watch RV ClashBox automatically creates new viewpoints! Of course, this can take several minutes if you have thousands of clashes in the selected set.
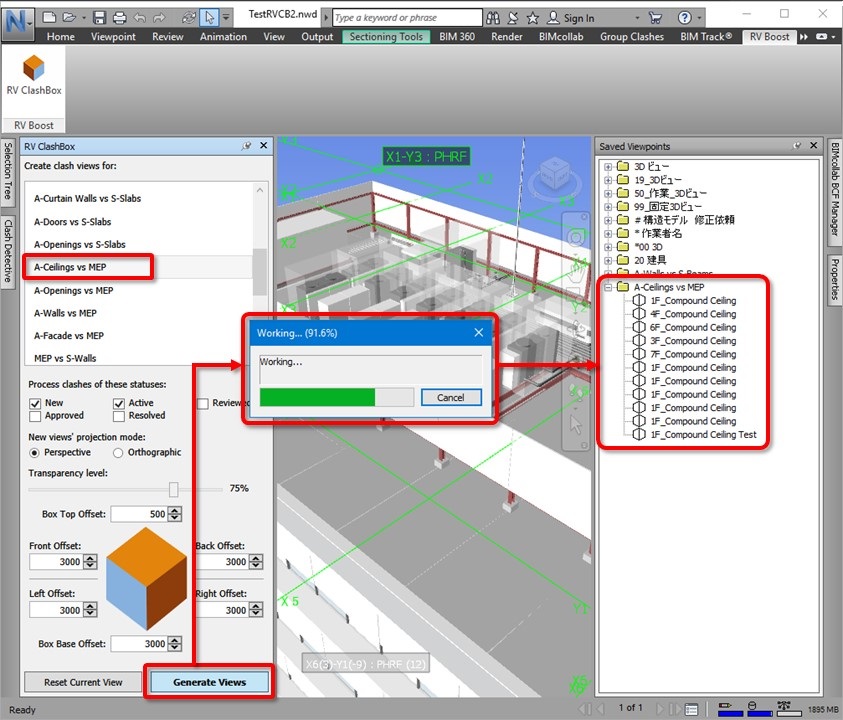
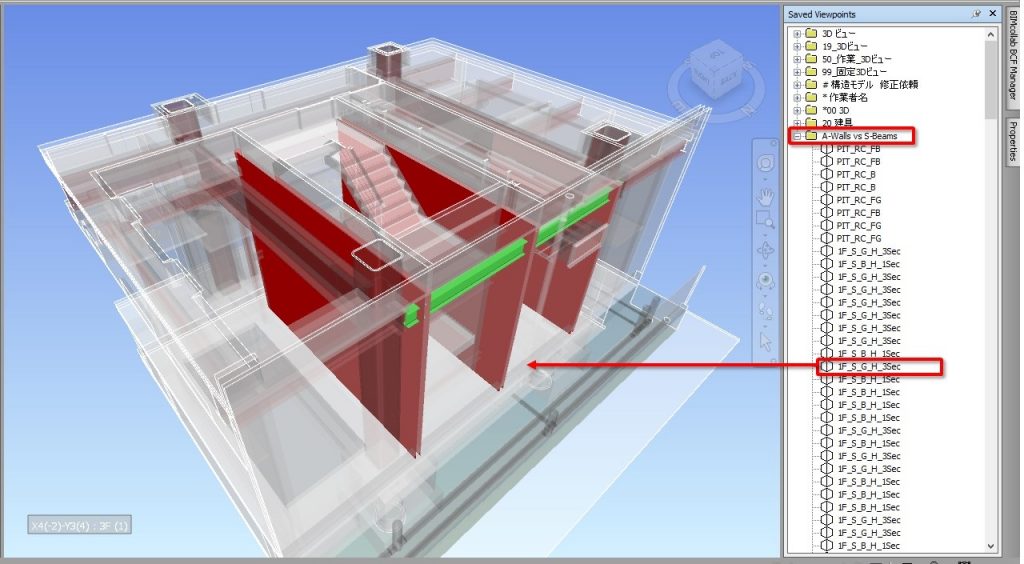
Once the process is complete, open Navisworks’ Saved Viewpoints panel and you will see new views organised into folders named after your selected tests. Each view will have clashing elements highlighted in the original red and green colors used in Clash Detective. All context elements will show in your selected transparency ratio.
FINE-TUNING RESULTS
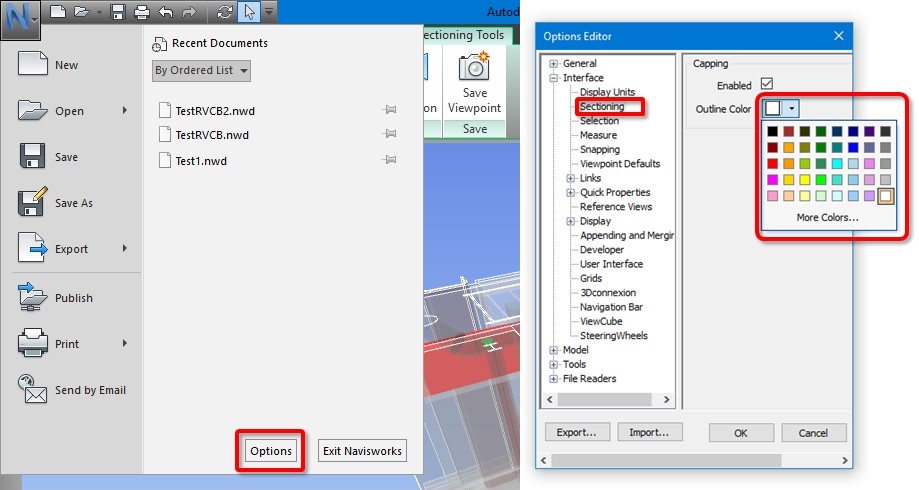
By now, your generated views should be ready to go. However, you may want to change Navisworks’ sectioning color if that’s currently Red. This red color is a bit confusing because our clashing elements are now in the same shade.
The good news is once you’ve changed this color, Navisworks will remember your choice for all future sessions. To do this, simply open Navisworks Options, navigate to Interface > Sectioning, and then change the Outline colour here to something else. We recommend white.
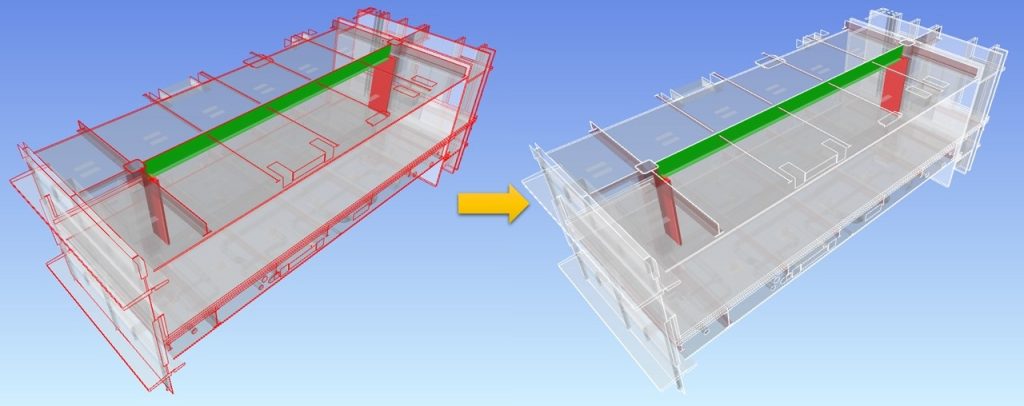
If you also want to change the transparency level for all generated views, simply adjust the slider in the RV ClashBox window, and click Generate Views again. Below shows the difference between 75% and 25% transparency.
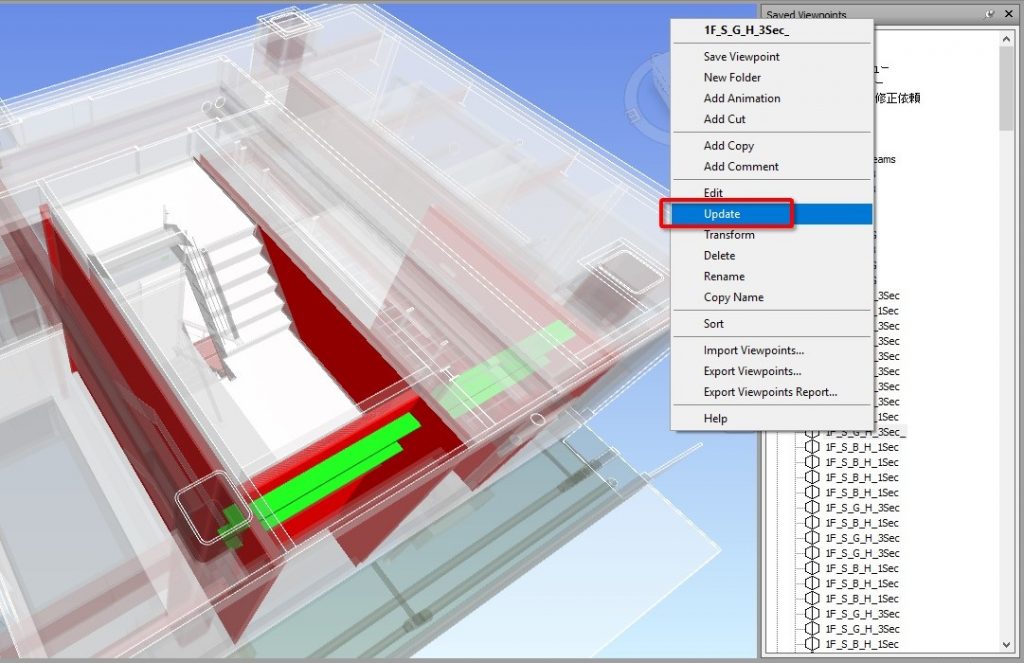
If you only want to make individual context elements more or less transparent, simply select them in the generated view, go to the Item Tools tab, and change the percentage there.
Remember to then right click the viewpoint and choose Update. Otherwise, Navisworks won’t save your chances.
What if you also want to resize each view’s section box? Really easy! Simply return to RV ClashBox, adjust any of the 6 Offset values, and press Generate Views. Here’s how a view changes when we reduce the Front, Back, Left and Right offsets from 3 to 0.5 meter.
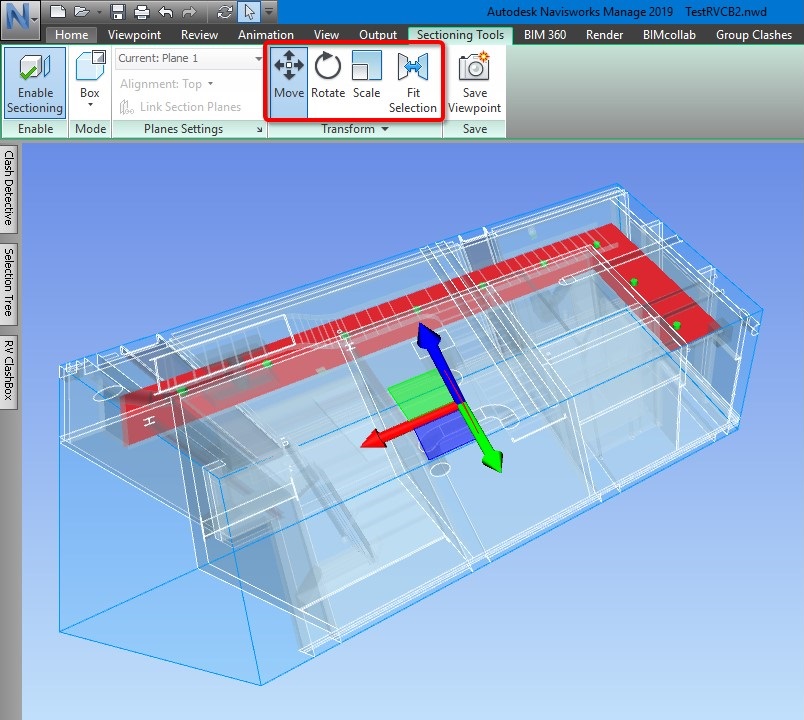
Of course, you can also resize the section box for individual views if necessary. Simply browse to the Sectioning Tools tab and use any required commands below.
Finally, if you ever need to reset the clash view, simply click “Reset Current View”. This will disable all graphic overrides and the section box for the current view. The command doesn’t update the saved viewpoint of the clash, so you can still reopen the viewpoint to get back the section box and transparency overrides. Flipping back and forth between the saved and reset views is really good for reviewing clashes near the building envelope.
REVIEW CLASHES IN NAVISWORKS FREEDOM
An added benefits of this workflow with RV ClashBox is your colleagues can now easily review these clashes even in the free Navisworks Freedom app. This is because we are now able to extract clash information from the Clash Detective module, only available in Navisworks Manage, to the Saved Viewpoints area.
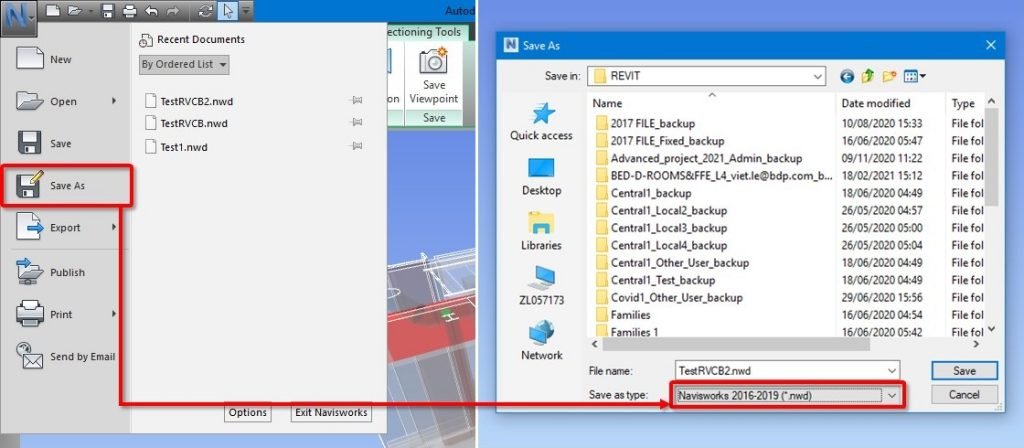
As a result, when you publish the Navisworks model to NWD, all these viewpoints will be saved with it.
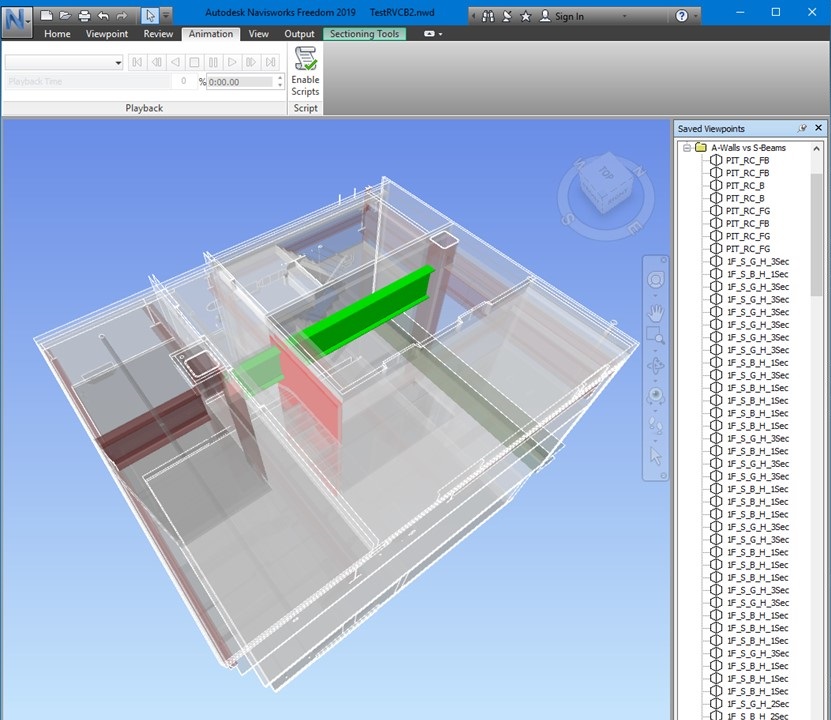
When anyone then opens this NWD file in Navisworks Freedom, all these views will be available for them to review.
COMPATIBLE WITH ALL CLASH TRACKING APPS
Most popular clash tracking programs support batch-creating issues from saved viewpoints in Navisworks. For example, you can quickly turn 300 viewpoints generated by RV ClashBox into 300 issues on platforms like BIM Track, BIMcollab, Revizto and so on. They will preserve the views’ section box and graphic overrides, and save that into the issues as screenshots. This will really help your wider design team quickly understand clashes in context, and quickly make you really popular!
WORK SMARTER, NOT HARDER
As you can see, create and optimise viewpoints for your clashes in batch is really easy with RV ClashBox for Navisworks. Even better, you can start using this add-in completely for free! Simply click the button below to begin saving some serious amount of time during model coordination.
Need more Pro-tips?
Check out below our free Revit training channel on YouTube!


Good Afternoon:
My name is Michael Corbett and I am with Turner Construction. I am utilizing your trial, and am actively writing a white paper to attempt to convince Turner to utilize RV Clashbox throughout our VDC Departments. Let me know if you have any data on time savings and such! I’d happily include it.
Hi Michael,
Sorry for the late reply, and thanks for talking about RV ClashBox with your peers!
We created and use RV ClashBox for our own daily coordination and clash resolution work. It saves a lot of time. Image preparing a clash view in 1/100 of a seconds instead of 5 minutes! Unfortunately however, we haven’t precisely tracked and recorded how much time was saved. We just know it’s big enough to always have the app in Navisworks, so would rather spend time building other similar apps you will soon see debuted!
If you need any more help with understanding and trying RV ClashBox, we’ll be delighted to help.