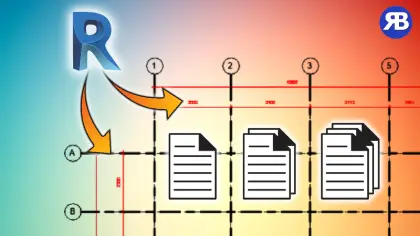
Revit Snippet: Dimensions All Grids in All Views in Seconds
If you are still manually placing grid dimensions in Revit, you are spending far more time than you need to. On small projects this might feel manageable, but once you are dealing with large models and dozens or even hundreds of views, it quickly becomes repetitive and inefficient.
In this tutorial, you will learn how to automate grid dimensions in Revit using Dynamo and a simple Python script. This approach allows you to generate clean and consistent dimensions in just a few clicks.
Resources
✅ My full Python Scripting for Dynamo course
✅ My other tutorial on using Python for Dynamo in Revit
✅ My other tutorial on setting up and using Visual Studio Code for writing Python code in Dynamo
Why Automate Grid Dimensions in Revit
Grid dimensioning is one of those tasks that is simple but time-consuming. Automating it can significantly improve your productivity and consistency across drawings.
Here is why this matters:
• Save hours of repetitive manual work
• Ensure consistent dimension placement across all views
• Reduce human error in large projects
• Speed up documentation workflows for teams
If you are working in BIM on real world projects, this is a quick win that delivers immediate value.
What You Will Learn in This Tutorial
This video walks you through the entire process of building a working Dynamo script from scratch.
You will learn how to:
• Select grid lines directly from Revit using Dynamo
• Use a Python node inside Dynamo for custom logic
• Access and unwrap Revit API elements correctly
• Detect grid orientation and calculate perpendicular directions
• Create dimension lines automatically in the active view
• Safely create Revit elements using transactions
By the end, you will have a reusable script that can be applied to any project.
How the Automation Works
At a high level, the script follows a clear and logical workflow.
First, you select multiple parallel grid lines in your Revit model. These are passed into Dynamo and then into a Python script.
The script then:
• Extracts the grid geometry from the active view
• Calculates the direction of the grids
• Generates a perpendicular vector for dimension placement
• Creates a dimension line based on a midpoint reference
• Collects references from all selected grids
• Generates a Revit dimension automatically
This ensures that your dimensions are always aligned and correctly positioned.
Take It Further with Advanced Automation
This tutorial is just the beginning. Once you understand this workflow, you can expand it into more powerful automation tools.
In upcoming tutorials, you will learn how to:
• Turn grid bubbles on or off across multiple views
• Generate grid dimensions in bulk across many views
• Place dimensions at custom offset distances
• Build advanced tools similar to professional plugins
These techniques can help you scale your Revit workflows to a much higher level.
Who This Is For
This tutorial is perfect for:
• Revit users looking to improve efficiency
• BIM professionals working on large scale projects
• Anyone learning Dynamo and Revit automation
• Teams that want consistent documentation standards
Final Thoughts
Automating small repetitive tasks like grid dimensioning can have a huge impact on your overall productivity. Instead of spending time clicking through views, you can focus on higher value design and coordination work.
If you found this helpful, consider sharing it with your team or colleagues who use Revit daily 😊
And if you want more tutorials like this, stay tuned for upcoming content where we build even more powerful automation tools.