Revit Snippet: Move Elements to Specific Coordinates
If you’ve ever struggled to place elements precisely within your Revit model, you’re not alone. Whether you’re aligning structural columns with exact site coordinates or updating element locations from an external data source, accurate positioning can be tedious—unless you’re using the right tools and techniques.
In this guide, we’ll explore three powerful ways to move elements in Revit to specific coordinates. From simple manual methods to fully automated workflows using the RV Live Coordinates plugin, this post breaks it all down step by step.
Resources
✅ User Guide for RV Live Coordinates
✅ Dual Diagnostic Tripod Family
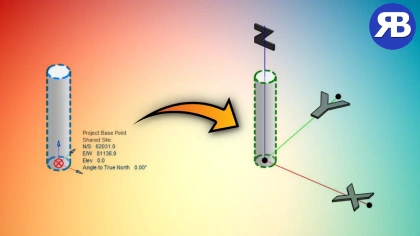
1. Move Elements Using the Project Base Point
The Project Base Point is a quick and easy way to align an element with specific coordinates. It’s especially useful for small adjustments to individual objects.
Steps:
- Enable the Project Base Point: Go to Visibility/Graphics > Model Categories > Site > Check Project Base Point.
- Match Coordinates: Adjust the Project Base Point’s N/S (Y), E/W (X), and Elev (Z) values to match your element’s coordinates.
- Move the Element: Snap your element to the repositioned base point for precise placement.
- Reset: Remember to move the base point back to its original location—especially on large, coordinated projects.
⚠️ Tip: Moving the Project Base Point can affect linked models and shared coordinates. Use with caution!
2. Use a Custom Coordinate Marker Family
Need a more visual method that won’t interfere with your model’s base point? Try the Dual Diagnostic Tripod—a free, custom Revit family designed for coordinate tracking.
Steps:
- Download the Family: Grab the Dual Diagnostic Tripod family from the video’s description or your resources.
- Place It in Your Model: Insert it at your survey point or internal origin.
- Enter Coordinates: Set the tripod’s X, Y, and Z values to match your desired location.
- Move the Element: Snap your object to the tripod’s second marker for precise positioning.
✅ This method lets you simulate a “virtual base point” without disturbing your actual coordinate system.
3. Automate Element Placement with RV Live Coordinates + Excel
For bulk element updates, automation is your best friend. This method is ideal for projects where you receive updated coordinates in CSV or Excel format from surveyors or contractors.
Steps:
- Install RV Live Coordinates: Start your free trial and configure it to track your desired Revit categories (e.g., Structural Columns).
- Export the Schedule: Create a schedule with the X, Y & Z parameters, then export it to Excel.
- Update Coordinates in Excel: Use formulas or manual input to apply new coordinates (e.g., shifting all columns 2 meters along the X-axis).
- Import the Updated Excel: Use a free plugin like M-Labs Excel Import/Export to sync Excel data back into Revit.
- Move Elements Automatically: In RV Live Coordinates, click “Move Elements to Coordinates” and watch your model update instantly.
🔁 This method works with all coordinate systems—shared, project base point, internal origin, or survey point.
Why RV Live Coordinates Is a Game-Changer
RV Live Coordinates isn’t just about tracking locations. It gives you full control over element positioning in Revit:
- ✅ Supports any coordinate system
- ✅ Automatically updates shared parameters (X, Y, Z)
- ✅ Offers multiple reference points (insertion, centroid, start/end points)
- ✅ Integrates seamlessly with Excel for bulk updates
- ✅ Saves time and improves precision on large-scale projects
Ready to take control of your Revit coordinates?
💥 Try RV Live Coordinates for FREE and see how much easier your modeling workflows can become. Whether you’re aligning columns or managing site-wide updates, this tool makes precision simple.
👉 Download your free trial now
And if this tutorial helped, be sure to subscribe to our channel here for more tutorials like this every week!


