-
CAD Files Explorer
-
RV BatchTransmit
-
RV CameraPlanner
- Quick Start
- Speed up camera obstruction detection
- Configure camera obstructions
- Obstruction check plane
- Vary filled region settings by camera type
- Create multiple filled regions per camera
- Customize filled region appearance
- Filled region's origin offset
- Rotate filled region around camera
- Transfer settings between models
-
RV ClashBox
-
RV DeepClean
-
RV FamilyPurge
-
RV Live Coordinates
-
RV RoomLink
- Quick Start Guide
- Settings Checklist
- Use Custom Filters
- Guess Directions
- Use location projection on level
- Elements without rooms assigned
- Combine contained elements' parameters
- Count containted elements
- Distribute numeric room/space values
- Schedule objects above ceilings
- Schedule doors & windows by linked rooms
- Copy element data to rooms/spaces
- Extend Room/Spaces to Bounds
- Using a Network License
-
RV ZoneMonitor
-
Licensing
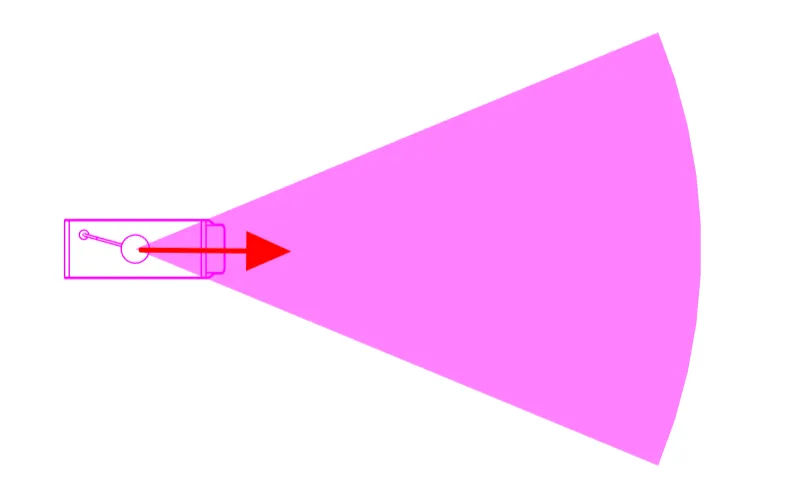
Filled region’s origin offset
By default, RV CameraPlanner draws the filled region from the placement point of the CCTV camera family instance. This may not look right if your camera has the location at its center:
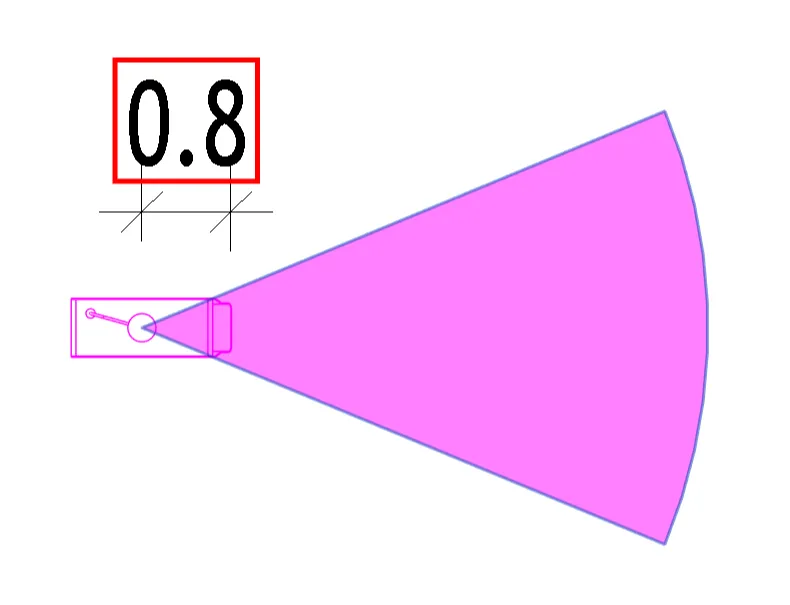
Guess what? The app has a dedicated setting to fix this! To start, measure how much you want the filled region to move away from the camera’s location point:
Next, open the configuration card for the camera, and provide that value in either the “X Offset distance” or “Y Offset distance” box. Which box to use will depend on your camera family’s main orientation vector, so you may need to try both to find the correct one.
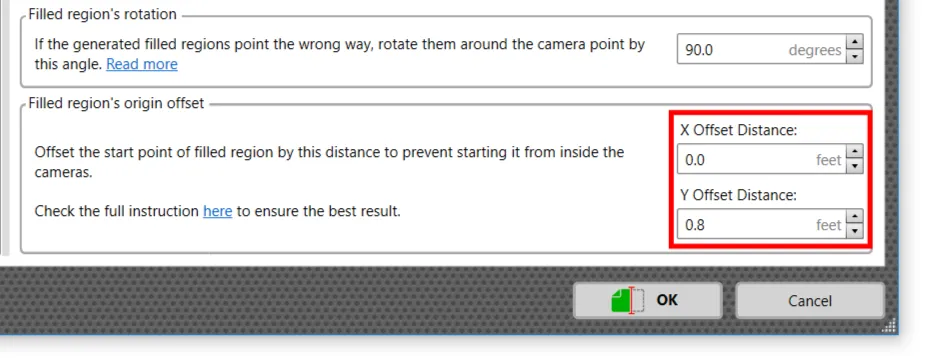
Save your settings and regenerate the filled region.

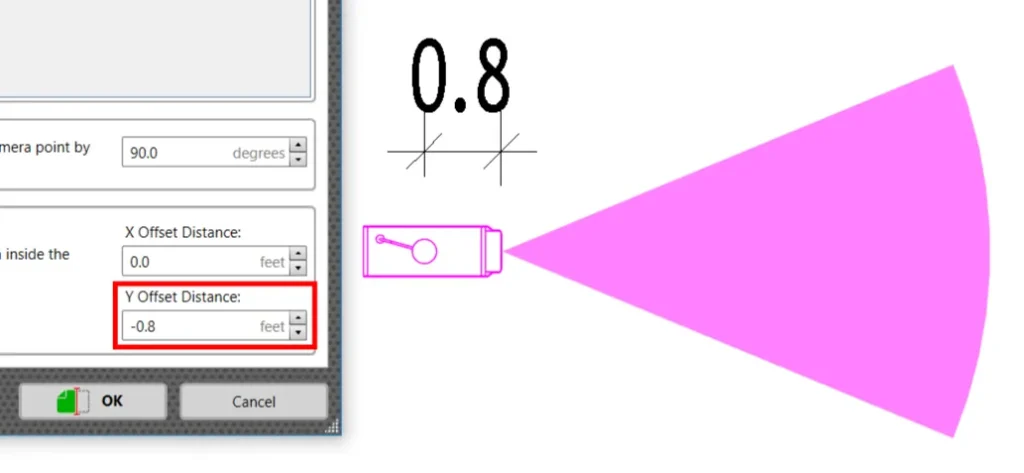
If the filled region moves in the wrong direction, change the offset value to negative should fix it:
As you can already tell, this setting is really specific to the camera family. If necessary, create additional configuration cards to specify the correct offset for other families as well.
