Rotate filled region around camera
You may sometimes want to rotate the filled region relative the its CCTV camera instance. For example, you may expect the filled region to be like below for this camera:
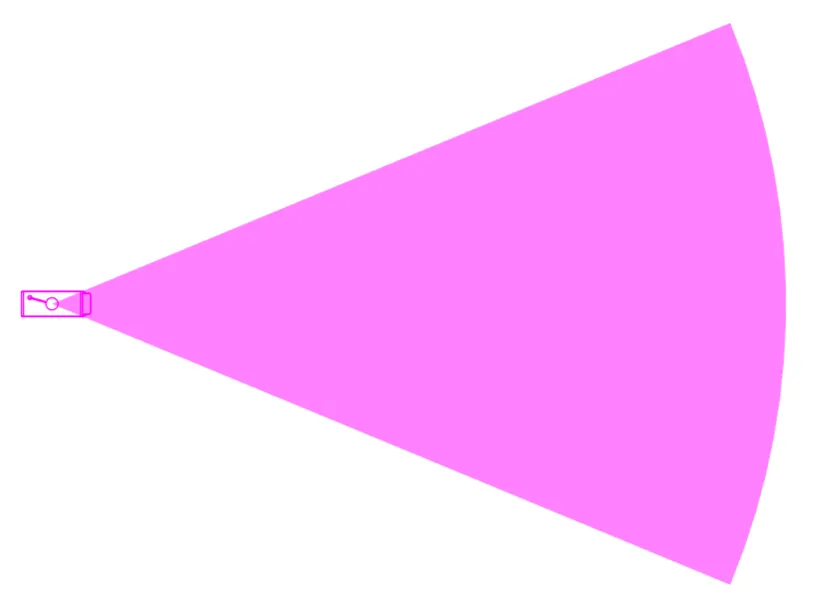
However, running RV CameraPlanner for the first time could give you the output below instead:

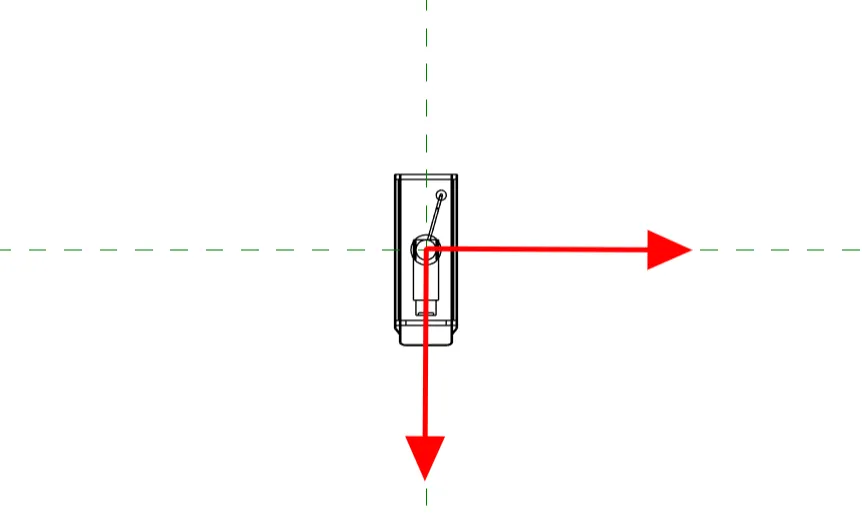
This is because there’s no universal rule on which direction is the main orientation of a Revit camera family. Some families pick the X axis as the camera’s view direction. Others may use another direction like our example camera here:
To make sure you can use RV CameraPlanner without having to change your camera family, the app allows you to rotate the filled region around the camera ‘s location point by a custom angle. Only after this rotation will the app proceeds to computing the camera’s field of view.
For our example camera above, setting the angle to 90 degrees does the trick:

Note that you may need to try a few different values here until you find the right rotation angle for you camera family. The input also accept negative values, which will rotate the filled region in the opposite direction.
