-
CAD Files Explorer
-
RV BatchTransmit
-
RV CameraPlanner
- Quick Start
- Speed up camera obstruction detection
- Configure camera obstructions
- Obstruction check plane
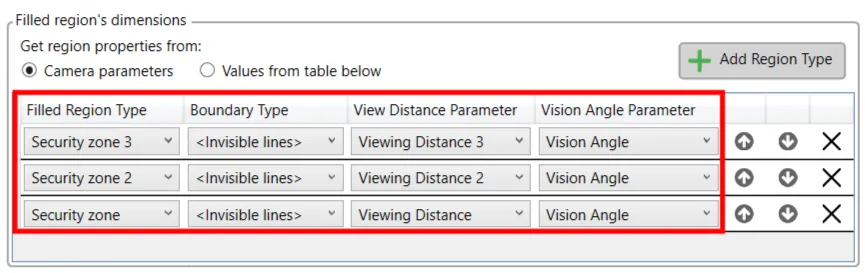
- Vary filled region settings by camera type
- Create multiple filled regions per camera
- Customize filled region appearance
- Filled region's origin offset
- Rotate filled region around camera
- Transfer settings between models
-
RV ClashBox
-
RV DeepClean
-
RV FamilyPurge
-
RV Live Coordinates
-
RV RoomLink
- Quick Start Guide
- Settings Checklist
- Use Custom Filters
- Guess Directions
- Use location projection on level
- Elements without rooms assigned
- Combine contained elements' parameters
- Count containted elements
- Distribute numeric room/space values
- Schedule objects above ceilings
- Schedule doors & windows by linked rooms
- Copy element data to rooms/spaces
- Extend Room/Spaces to Bounds
- Using a Network License
-
RV ZoneMonitor
-
Licensing
Transfer settings between models
RV CameraPlanner always saves your settings in the active Revit model. This way, the settings are always restored the next time you open the same model.
If your projects have multiple Revit files however, it can be a challenge to make sure they all visualize the camera field of view in the same way. This is where sharing settings across different models is useful!
Simply configure your settings in one model, use the ‘Export Settings’ button, and save your configuration to a file. You can then import this settings file into any other Revit file.
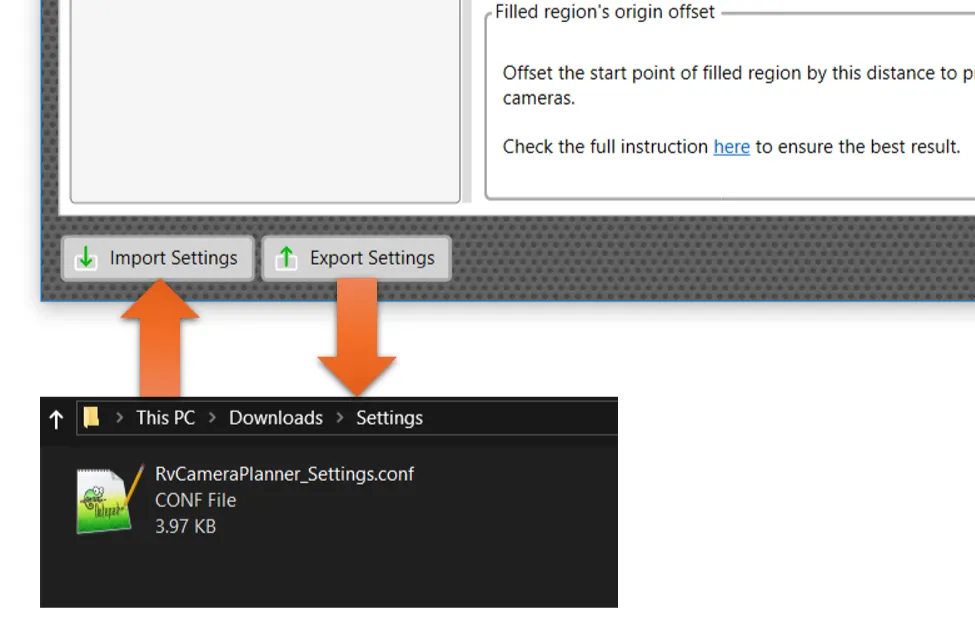
If you use camera parameters to specify viewing distance and vision angle, make sure the models all have these parameters before importing your settings.
Likewise, ensure the new model has element filters that your settings reference. Otherwise, the app may process more or fewer cameras than intended.
