Fine-tuning clash views
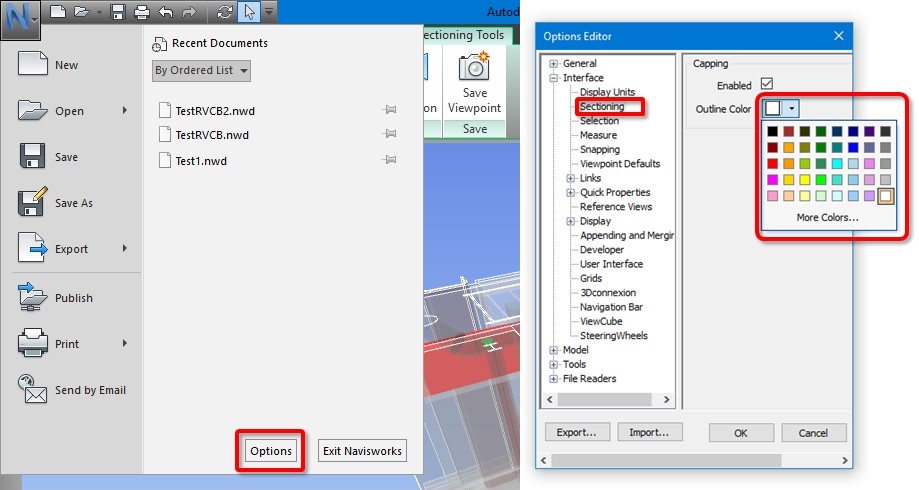
By now, your generated views should be ready to go. However, you may want to change Navisworks’ sectioning color if that’s currently Red. This red color is a bit confusing because our clashing elements are now in the same shade.
The good news is once you’ve changed this color, Navisworks will remember your choice for all future sessions. To do this, simply open Navisworks Options, navigate to Interface > Sectioning, and then change the Outline colour here to something else. We recommend white.
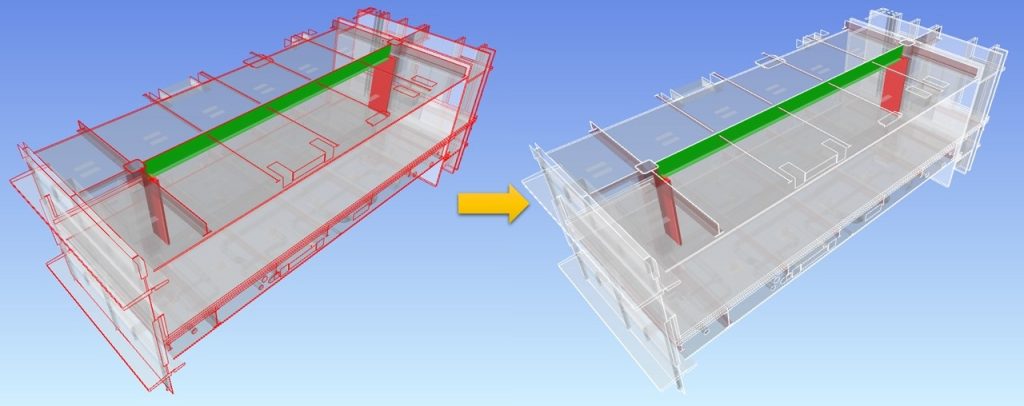
If you also want to change the transparency level for all generated views, simply adjust the slider in the RV ClashBox window, and click Generate Views again. Below shows the difference between 75% and 25% transparency.
If you only want to make individual context elements more or less transparent, simply select them in the generated view, go to the Item Tools tab, and change the percentage there.
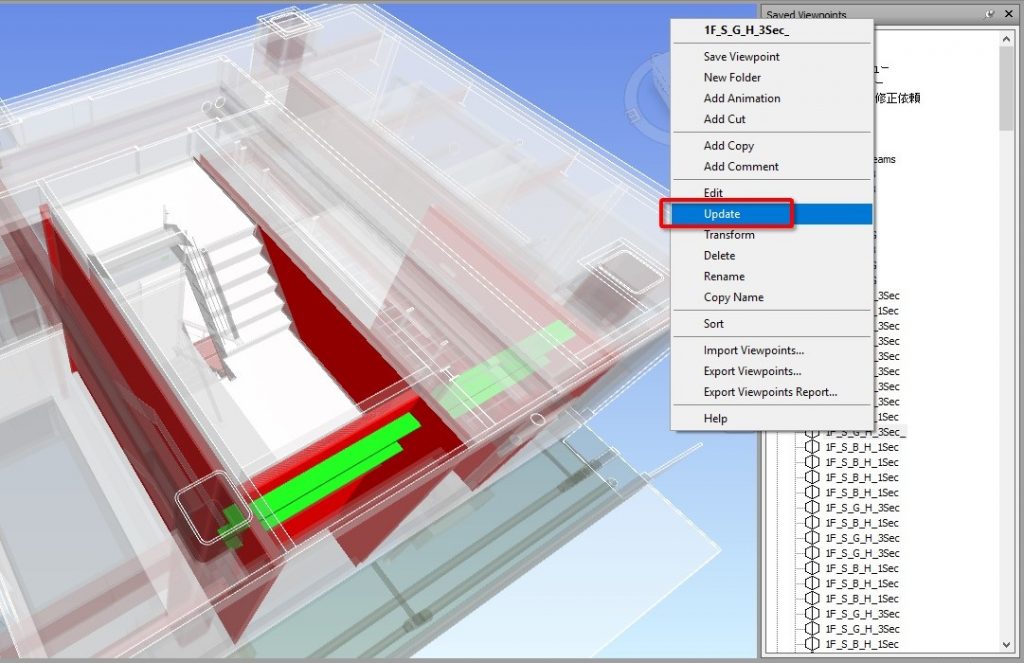
Remember to then right click the viewpoint and choose Update. Otherwise, Navisworks won’t save your chances.
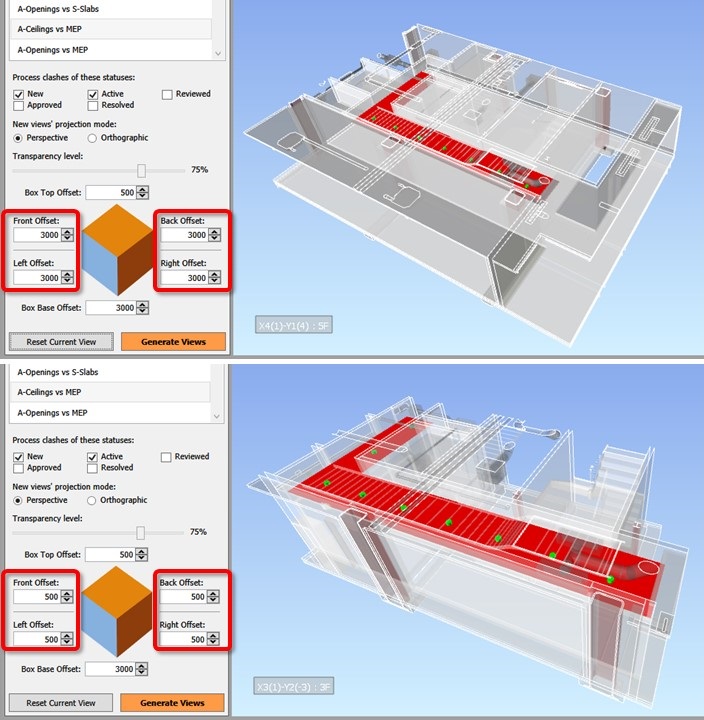
What if you also want to resize each view’s section box? Really easy! Simply return to RV ClashBox, adjust any of the 6 Offset values, and press Generate Views. Here’s how a view changes when we reduce the Front, Back, Left and Right offsets from 3 to 0.5 meter.
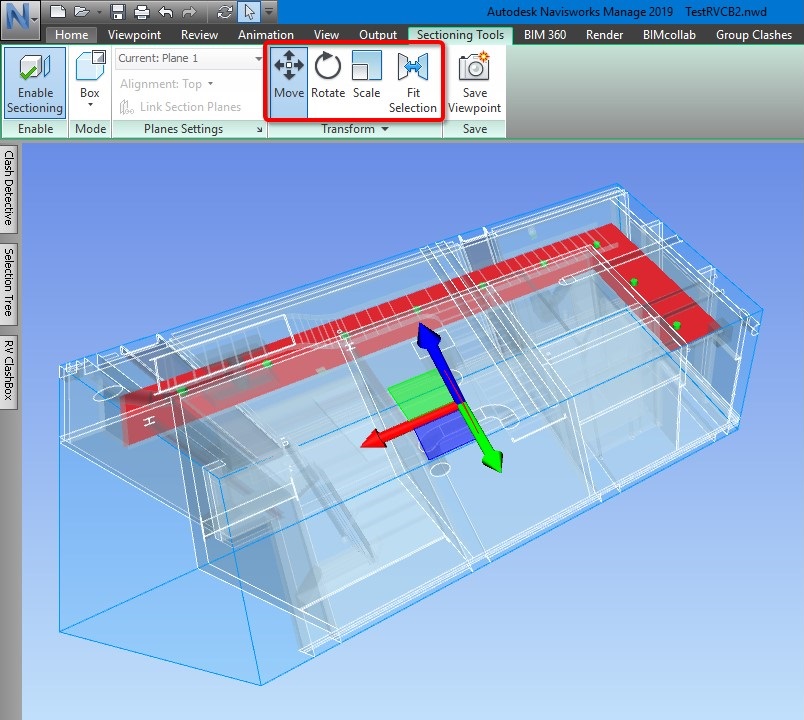
Of course, you can also resize the section box for individual views if necessary. Simply browse to the Sectioning Tools tab and use any required commands below.
Finally, if you ever need to reset the clash view, simply click “Reset Current View”. This will disable all graphic overrides and the section box for the current view. The command doesn’t update the saved viewpoint of the clash, so you can still reopen the viewpoint to get back the section box and transparency overrides. Flipping back and forth between the saved and reset views is really good for reviewing clashes near the building envelope.