RV Help Center
-
CAD Files Explorer
-
RV BatchTransmit
-
RV CameraPlanner
- Quick Start
- Speed up camera obstruction detection
- Configure camera obstructions
- Obstruction check plane
- Vary filled region settings by camera type
- Create multiple filled regions per camera
- Customize filled region appearance
- Filled region's origin offset
- Rotate filled region around camera
- Transfer settings between models
-
RV ClashBox
-
RV DeepClean
-
RV FamilyPurge
-
RV Live Coordinates
-
RV RoomLink
- Quick Start Guide
- Settings Checklist
- Use Custom Filters
- Guess Directions
- Use location projection on level
- Elements without rooms assigned
- Combine contained elements' parameters
- Count containted elements
- Distribute numeric room/space values
- Schedule objects above ceilings
- Schedule doors & windows by linked rooms
- Copy element data to rooms/spaces
- Extend Room/Spaces to Bounds
- Using a Network License
-
RV ZoneMonitor
-
Licensing
< All Topics
Print
Offset Settings
Here’s how to adjust RV ClashBox based on your clash test!
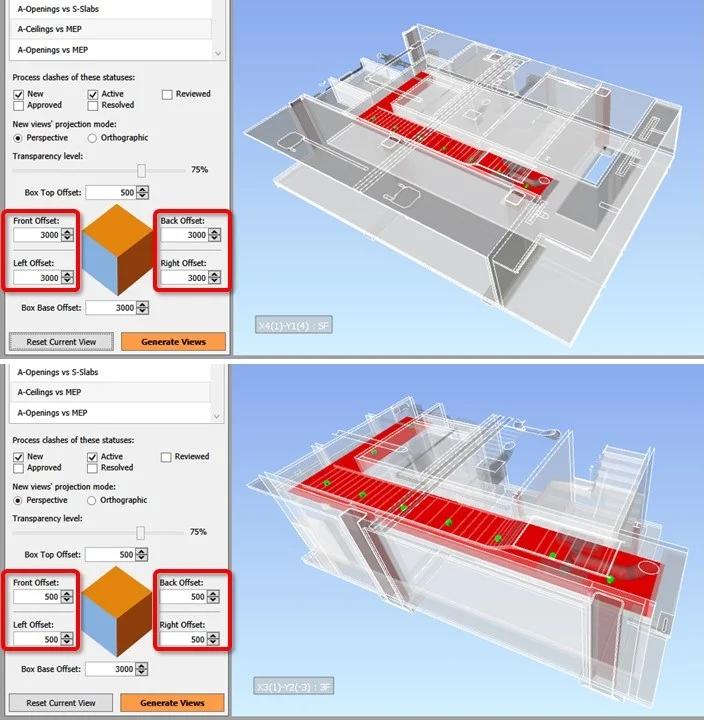
The default box offsets for Top/Bottom/Front/Back/Left/Right usually work for most scenarios. However, you can adjust these whenever necessary. For example:
✅ Checking clashes of MEP equipment on ceilings? You can increase the Top offset to around 1500mm. This will reveal more of the plenum space and help understand how your ceiling equipment influence the clash.
✅ Checking clashes around a vertical service or lift core? You can reduce all Front/Back/Left/Right offsets to 500mm and increase the Top/Bottom offsets to 5-10m. this helps fully understand the core top-to-bottom.
Contents