RV Help Center
-
CAD Files Explorer
-
RV BatchTransmit
-
RV CameraPlanner
- Quick Start
- Speed up camera obstruction detection
- Configure camera obstructions
- Obstruction check plane
- Vary filled region settings by camera type
- Create multiple filled regions per camera
- Customize filled region appearance
- Filled region's origin offset
- Rotate filled region around camera
- Transfer settings between models
-
RV ClashBox
-
RV DeepClean
-
RV FamilyPurge
-
RV Live Coordinates
-
RV RoomLink
- Quick Start Guide
- Settings Checklist
- Use Custom Filters
- Guess Directions
- Use location projection on level
- Elements without rooms assigned
- Combine contained elements' parameters
- Count containted elements
- Distribute numeric room/space values
- Schedule objects above ceilings
- Schedule doors & windows by linked rooms
- Copy element data to rooms/spaces
- Extend Room/Spaces to Bounds
- Using a Network License
-
RV ZoneMonitor
-
Licensing
< All Topics
Print
Visibility Settings
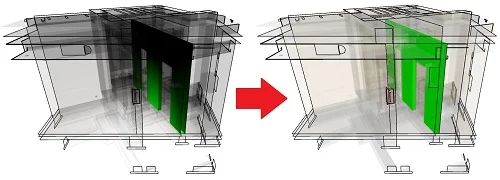
Clearly presented clash views are often the first to be resolved!
It’s basic human psychology that draws us to pretty things. With RV ClashBox, you can quickly create clash views that are easy on the eye and effortless to understand using all the available settings:
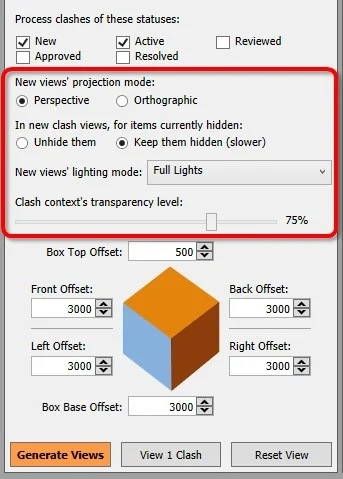
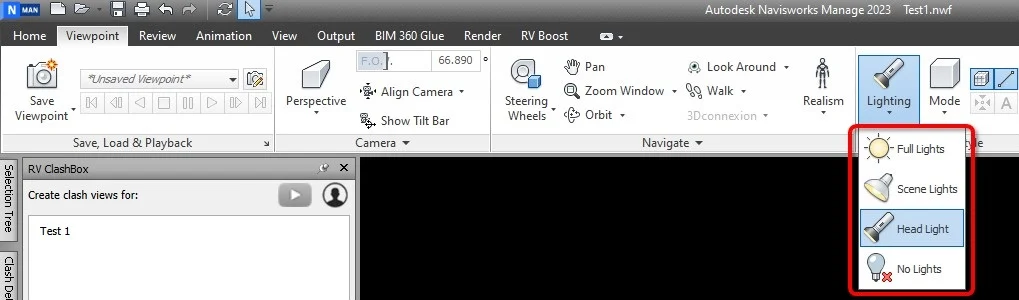
My favourite setting is “Lighting Mode”. You can select here a value that works best for your Navisworks model to make generated views as easy to see as possible:
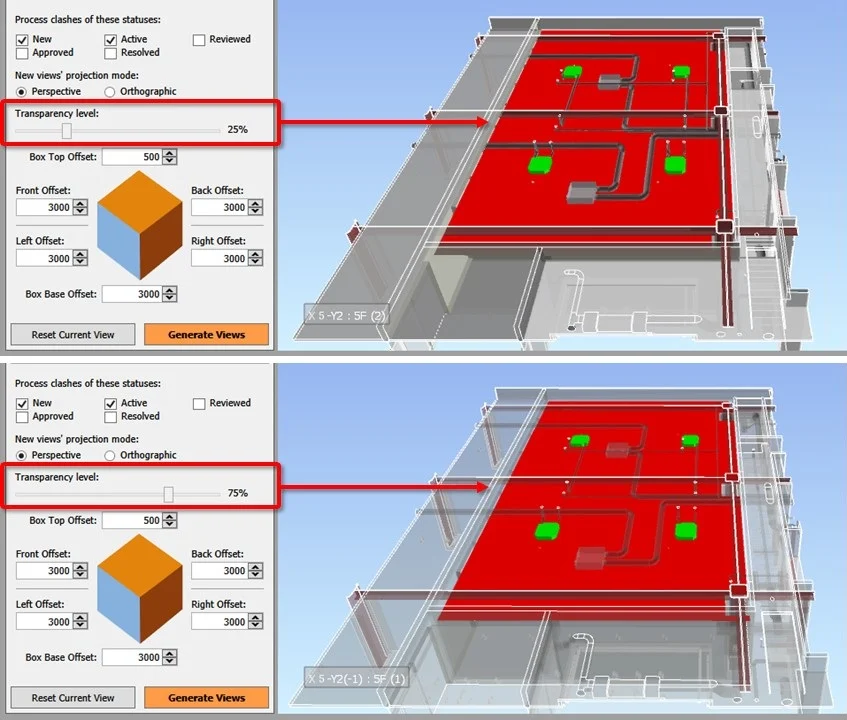
Another one I use most often is the Transparency Level slider. This allows adjusting how see-though the clash context is, making it easy to show clashes in even the busiest Navisworks model.
Contents