Use Custom Element Filters
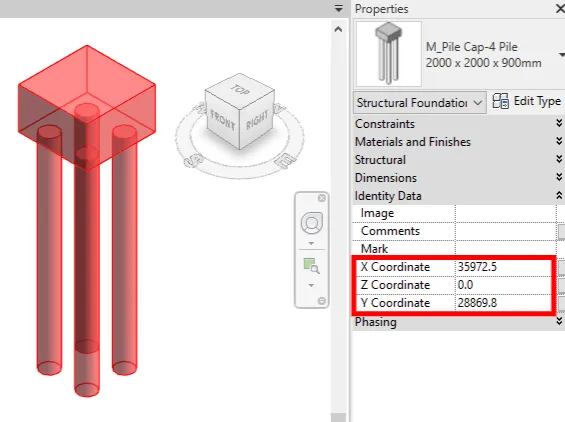
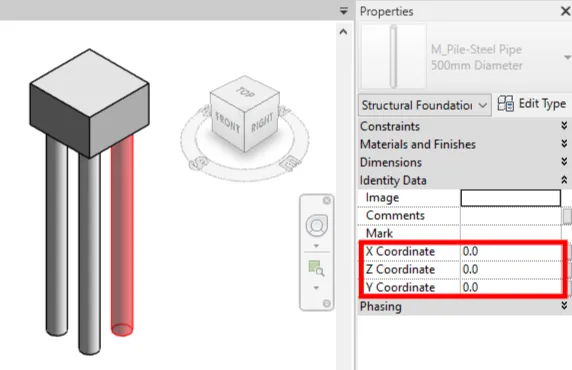
We sometimes don’t want RV LiveCoordinates to update all elements of a selected category. For example, we want to report coordinates of pile cap foundations but not the individual piles under each cap.
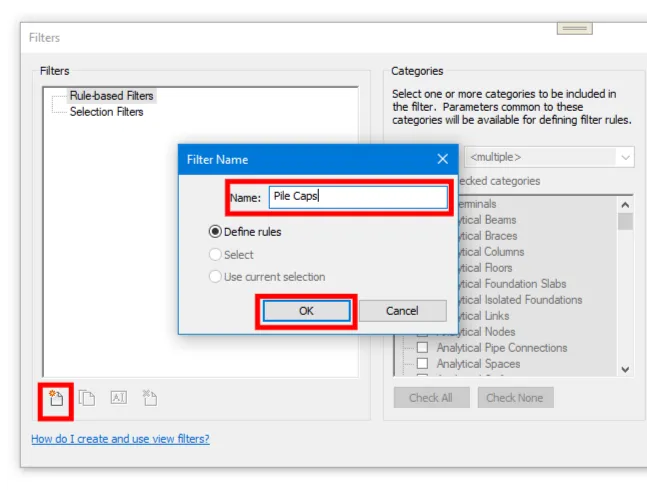
This is easy since RV LiveCoordinates fully supports using existing view filters in your model to specify exactly which elements to update. To start, create a view filter like this:

Give it a meaningful name, so you’ll know which one to select later in the app.
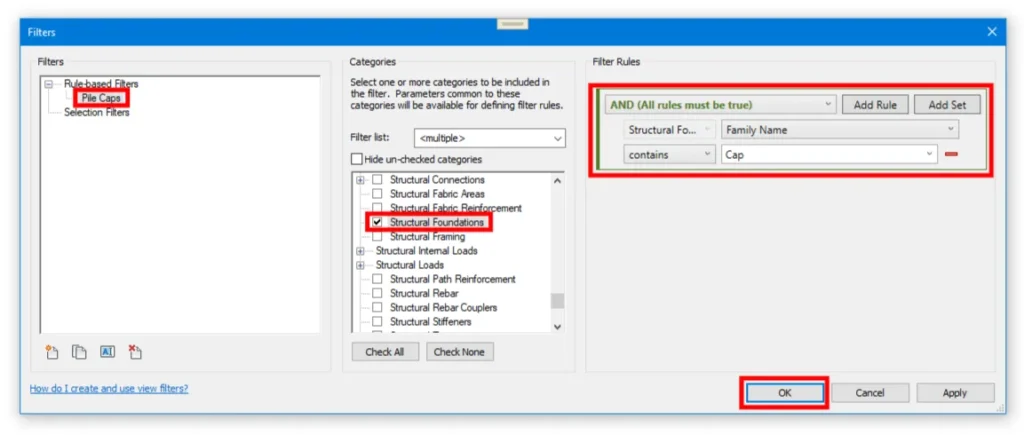
Specify the rules to filter elements by. You can combine different filter rules and filter sets just like you normally do in Revit. The rule can also target more than one category.
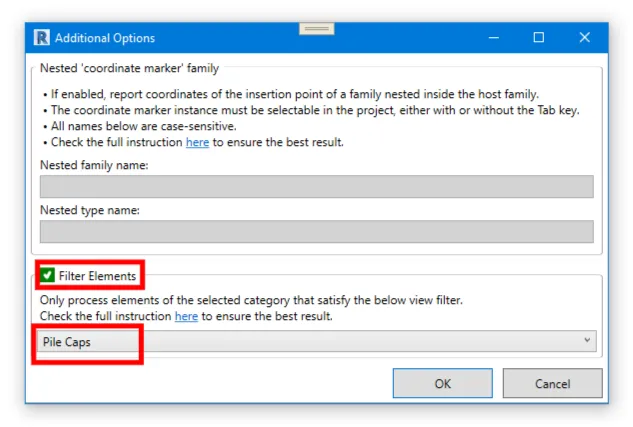
Next, open RV LiveCoordinates’ main window and click Edit on the relevant parameter link:
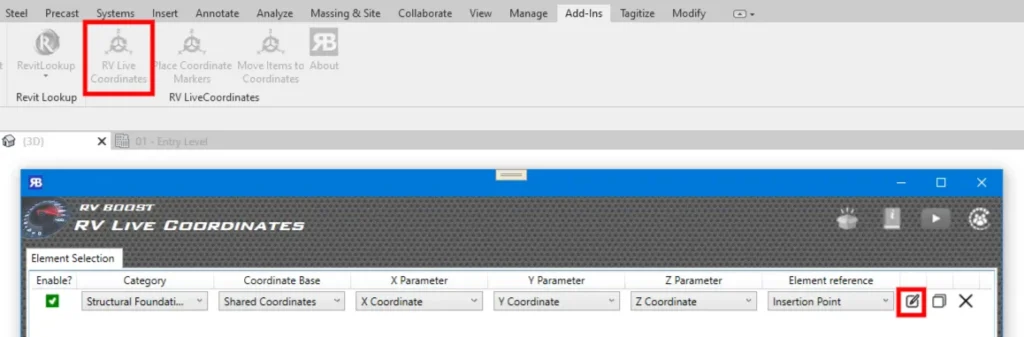
Enable element filtering, select the filter we created previously, then click OK. If you have a filter that targets multiple categories, just specify it again in other relevant parameter links.
And that’s it! Next time you update coordinate parameters with the app, it will only process elements of the selected category that satisfy all conditions in the filter you specified.

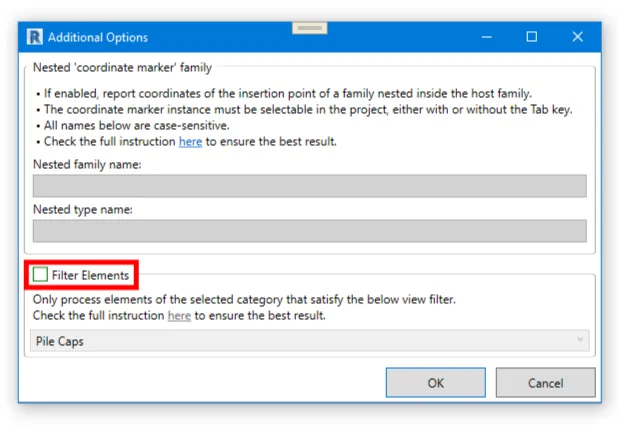
If you later change your mind and want to disable the filter, simply go back to the Edit window and uncheck this box:
Note that the filter needs to exist in the Revit model at the time of running coordinate update. If not, you will see the message below when opening RV LiveCoordinates:
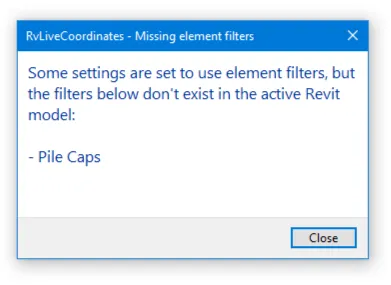
If you ignore that and run the update anyway, the app may update more elements than required, which can be problematic. Watch out for this behaviour, especially if you plan to reuse the settings from one model in another. The new Revit file needs to have the filters with the same name for the coordinate update to work as expected.
Pro tip: Use custom filters in combination with RV LiveCoordinates’ “Move Items to Coordinates” command to move only what makes sense! More info here.