-
CAD Files Explorer
-
RV BatchTransmit
-
RV CameraPlanner
- Quick Start
- Create 3D views from cameras
- Region parameters explained
- Configure camera obstructions
- Obstruction check plane
- Speed up camera obstruction detection
- Vary filled region settings by camera type
- Create multiple filled regions per camera
- Customize filled region appearance
- Filled region's origin offset
- Rotate filled region around camera
- Transfer settings between models
-
RV ClashBox
-
RV DeepClean
-
RV FamilyPurge
-
RV Live Coordinates
-
RV RoomLink
- Quick Start Guide
- Settings Checklist
- Use Custom Filters
- Guess Directions
- Use location projection on level
- Elements without rooms assigned
- Combine contained elements' parameters
- Count containted elements
- Distribute numeric room/space values
- Schedule objects above ceilings
- Schedule doors & windows by linked rooms
- Copy element data to rooms/spaces
- Extend Room/Spaces to Bounds
- Using a Network License
-
RV ZoneMonitor
-
Licensing
Coordinates of line-based Revit elements
First, check that the elements you want to report coordinates for are indeed curve-based or line-based. This means you place them by clicking two or more points instead of one. For example, a slanted column is line-based while a standard vertical one is not.
Second, open RV Live Coordinates and create 2 parameter links for the same category, for instance, “Structural column”.
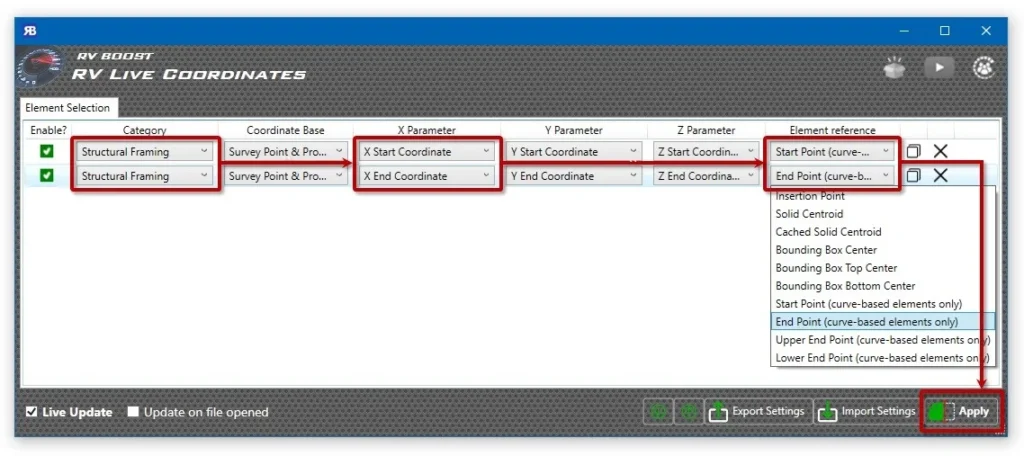
Next, verify that each parameter link will write to a different set of element parameters. You wouldn’t want them to overwrite each other.
Then, set the first parameter link to reference the elements’ start points. For the second parameter link, use the elements’ endpoints. If the element is slanted or vertical, you can also try the upper or lower endpoints.
Finally, click Apply. RV Live Coordinates will detect, record, and keep the coordinates of each element up to date as long as you have Live Update mode on!